Tuesday, December 9, 2014

Raspberry Freezer Jam (with a twist of chipotle)

Okay, well, it’s time for our 3rd official blog post.  Unfortunately we didn’t take Thanksgiving recipe photos…we figure everyone has their favorites and with this blog just starting well, just too much at once.  So instead we made jam…FREEZER JAM that is.  One of our local grocery stores had raspberries .50 cents (yes fifty cents…unheard of) a container.  Immediately the hubs thought, “we need to make some freezer jam”…like his folks used to make. 

So the Hubs bought a case of 12 and here we go…it was so SIMPLE. 

What you will need: raspberries, sugar, pectin & fresh lemon juice.


The first thing we did was sprayed them with a 50/50 solution of water and vinegar.  Then we rinsed them and picked out the ones that weren’t as pretty as the others or looked gooey. 


Next, since we could only rinse so many at a time we moved the cleaned ones into a measuring cup to smash them. While I went on to continue cleaning another batch, the Hubs smashed away.


This was easy and this also gave us an accurate measurement of how many cups we have to add the proper amount of ingredients later.  After each mashing we placed them in a large bowl.


We followed the instructions on the back of the Ball Fruit Jelly (Freezer Jam Pectin) and the only thing we can suggest is to maybe add a bit on lemon juice to help it become more jammy like. 


We then mixed it up with the sugar (to your tasting) and 2 packages (based on how many cups of jam we had) and then took a soup ladle and our handy dandy funnel and put into jars. 
Towards the end, we decided we wanted to add some chipotle peppers to it to pour over cream cheese and eat with crackers so we saved about five ladles full of the jam and added chipotle peppers into it.  This gives the jam a spicy/sweet flavor and is delicious over cream cheese.

And WA LA here we have 8 jars of regular jam and 5 jars of the chipotle/raspberry jam.  The whole process was about 1 hour and 15 minutes.

They then went to the freezer after they set for about 2 hours.  We will dress up the jars and give them to our neighbors and family as Christmas presents, with suggested uses.
M & S
Uptown Grange


Tuesday, November 18, 2014

Homemade Breakfast Biscuits (cheaper, better, healthier than fast food or prepared food & these freeze very well)

We have found out that with our family of four that six chickens is a few too many.  We have oodles of eggs (2-3 dozen) within a week.  We give away eggs weekly and then we try to find recipes that we can make that have lots of eggs in them.

One of our family favorites are the breakfast biscuits.  We have made these a few times. 

Depending upon your taste you can use a combination of onions, bell peppers, sausage, bacon and cheese.  You can use whatever amounts you are comfortable with.

Breakfast Sandwich Recipe

1 dozen eggs beaten
1-2 T milk
Salt to taste
Pepper to taste
1 log Breakfast Sausage (crumble cooked)
½ to 1 package Bacon (cut up and cooked)
2 C Cheese (your choice)

Mix together in a bowl and pour into a 9 x 13 pan, bake at 375 for 25 minutes, more or less time depending upon your oven, let cook and slice into the number of biscuits that you have or the size of the biscuit. 

Optional ingredients:
Bell pepper, onions, mushrooms, spinach, kale….basically whatever you think you will like or know you like in your eggs or egg biscuits.  Below we made sausage patties, since we have decided it is easier to use the crumble cooked breakfast sausage.


We do use one short cut for this and that is frozen biscuits, cook as instructed on package.  We try to get the frozen grands biscuits, they are smaller and they don’t get a netchie (that is only way to describe it) as the grands biscuits from the refrigerator section. (picture provided are using the refrigerated biscuits)


Another note, you don’t have to make these into biscuits sandwiches, you can cook the eggs as above, cut into slices and eat as a nice healthy low carb breakfast as well, if eaten this way you can top with more cheese, sour cream, salsa or however you prefer to eat your scrambled eggs.  These also freeze very well.

If freezing them as biscuits, try to remember to bring them out the night before so they are thawed and then you can microwave them for 30 seconds. Otherwise, if they are frozen you can start off in the microwave for 1 minute and go from there until the middle is no longer cold.

If freezing as a low carb breakfast then place thawed egg in microwave for about 20 seconds.

Enjoy, I know my family really enjoys these and we all grab them as a nice a filling breakfast in the mornings (when we remember)....sometimes even at night.  

M & S
Uptown Grange

Sunday, November 9, 2014

And we begin...an Introduction

We've had chickens for well over a year now.  It isn't very often that we let our girls out to free range in the main backyard.  They have a complete side yard to themselves, but the grass is greener on the other side....so to speak.  Their run area does not have any grass, so the hubs lets them over into the main backyard for some free range time.  They have plenty of room in their run, just no grass.  

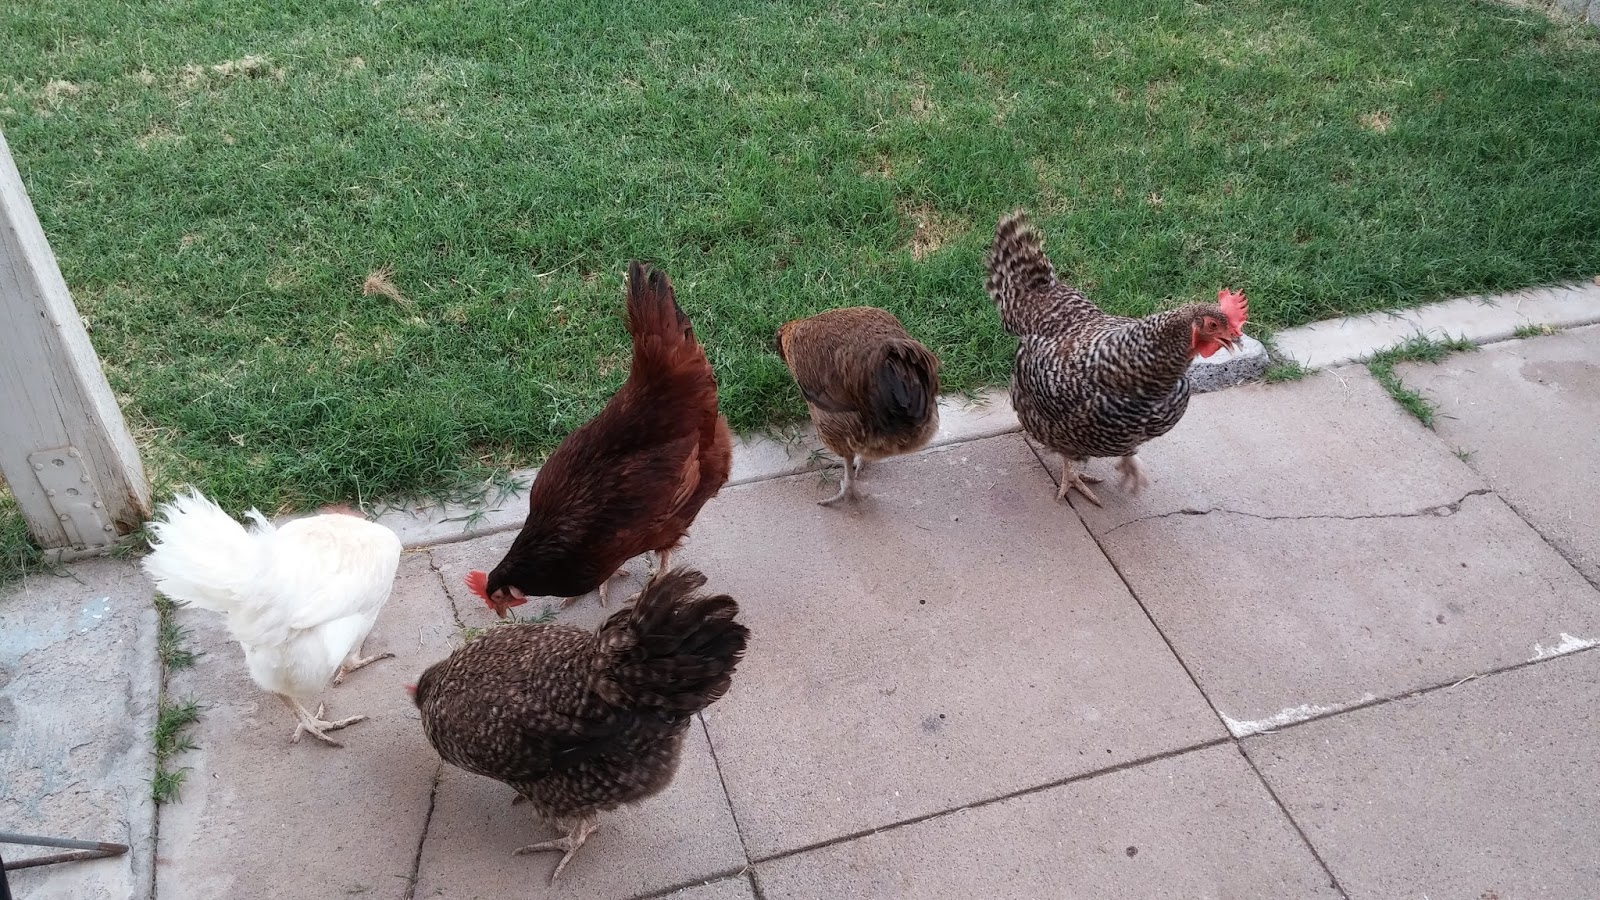
This is 5 of our 6 girls.  We have 1 Barred Rock that we adopted from the school that I work at.  She was our first chicken her name is Violet because she loves blueberries, and the instigator to convince us to get 5 more. Then we have Scarlet (Foxy Cleopatra) she is a Rhode Island Red, 2 Easter Eggers - Coco and Cupcake (Cupcake is not pictured).  We also have 1 white chicken Floppy Doodle Doo (not sure what breed she is, we were told a Delaware when we bought her, but know that isn't true), and last but not least is Moon "Cricket", she is a Black Copper Maran.  

Well, there you have it, an introduction to our girls.  We hope to bring you information on what we have learned in our first year of having backyard chickens, along with gardening tips, recipes, crafts, DIY and maybe some genealogy thrown in here and there.

M & S
Uptown Grange