Showing posts with label essential oils. Show all posts

Saturday, February 6, 2016

Winter Garden 2 0 1 6

This January we took a small chance and decided to try some to grow some veggies from seeds that we've never grown and some things we have been having a hard time growing.  

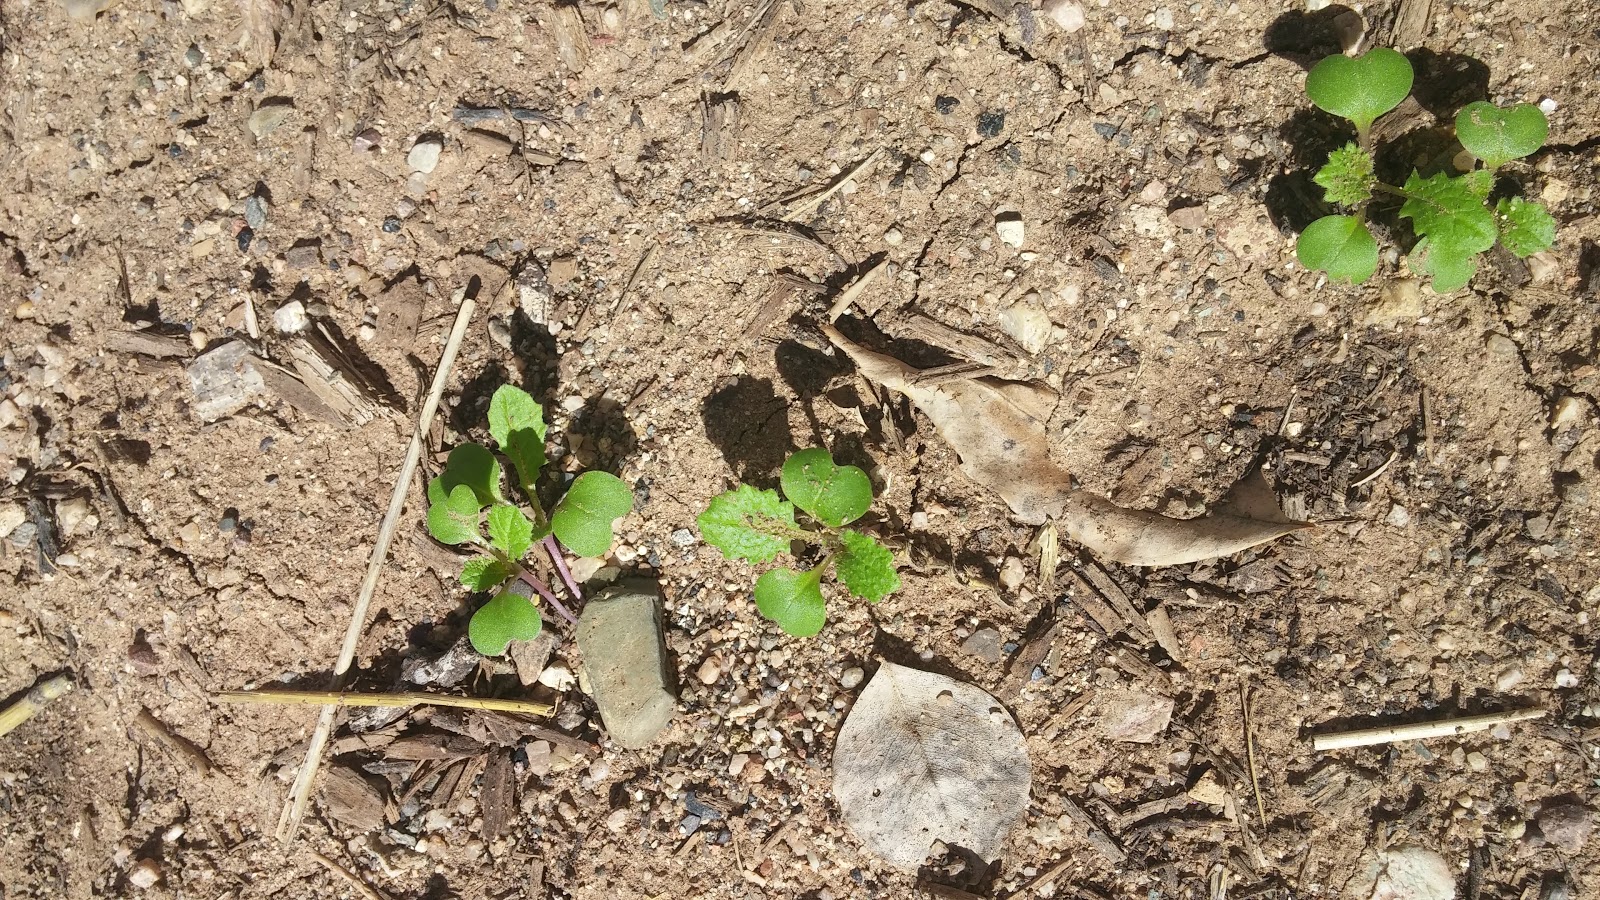
We planted everything in the former chicken yard on the west side of the house.  We planted brussel sprouts, turnips, butter lettuce, broccoli, napa cabbage and peas.  Everything took it time coming up, at least 2 weeks, but finally about a week ago things started popping up, everything except the brussel sprouts...of course, I can't seem to win with them.  We'll see how well everything does for the next month or so, before we have to pull everything to put in our spring garden.

the swiss chard patch doing well along with some volunteer tomatoes...
looks like I need to do some weeding out though....
the peas

Turnips (we've never grown these before)

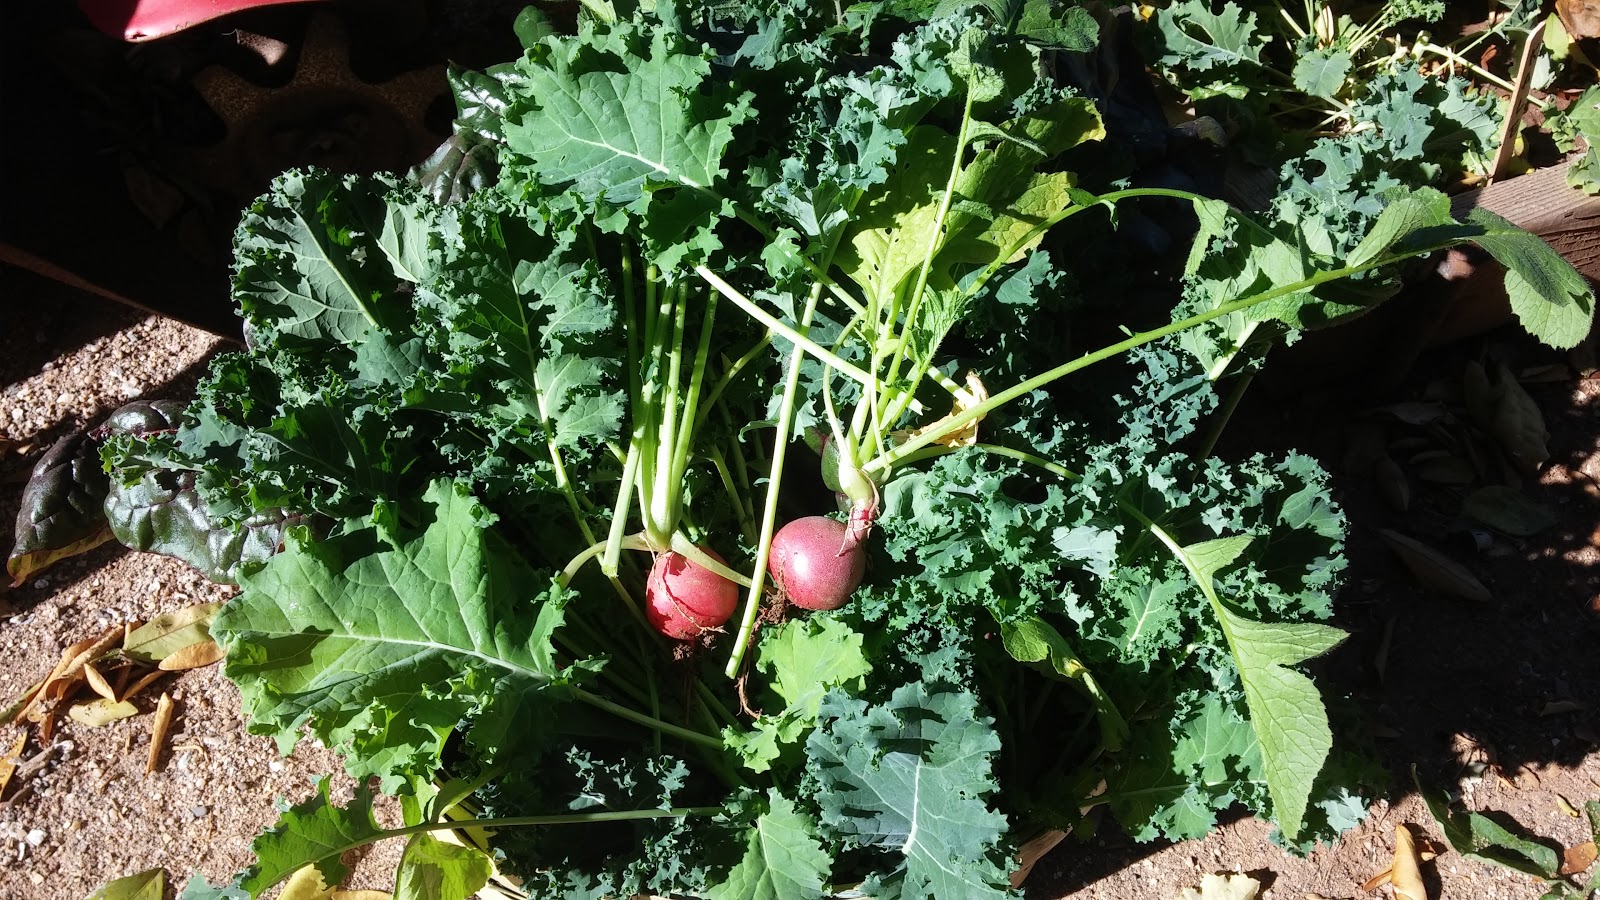
the kale and volunteer tomoatoes....

Volunteer tomatoes, thank you girls!
We are zone 9 and have had our share of freezes and freeze warnings the past 2 months.  We knew we were taking a chance, but we really didn't have anything to lose.  With this garden being on west side of the house and between houses we haven't had to cover anything, we've been pretty lucky.  

The cabbage and the spinach that we planted in the fall are growing a bit, but for some reason they never took off and grew into normal size plants.  We'll see if they change their mind before we need to put in the spring garden as well.  

Everything in the ground except the tomatoes will be yanked by the middle of March.  

If you live in the Phoenix Metro area, the city of Tempe is having a free compost day.  See this link for more information.  It's open to all valley residents.  City of Tempe ~ Free Compost

...the feast of the harvest, the fruits of thy labors... Exodus 23:16

M & S
Uptown Grange

Wednesday, January 20, 2016

City of Glendale, AZ to Allow Backyard Chickens!

We Did It!

In a unanimous decision on Tuesday, January 19, 2016 council instructed staff to create or change existing ordinance to allow backyard chickens. The support the council showed for this special item of interest was overwhelming to us. Each council member had something positive to say about backyard chicken keeping. With their support we knew we had made the right decision to push for allowing backyard chickens. Unless something unforeseen happens this will be approved.

Councilman Turner requested that there be a "Chicken Moratorium" while the city works out the details. His request was that unless chickens are reported as a nuisance that needs to be investigated (i.e., noise or odor complaints from the neighbors), that no chickens be "evicted" from the city. He also requested that this move in an expedited manner since the family that requested this has waited long enough.

We have waited close to 7 months for just this first step. We are on cloud 9 that we will be able to have backyard chickens again.

Now we have to wait for Planning and Zoning to create or change the existing ordinance. There is no telling how long this next step will take, however, staff was instructed by council to expedite this by several council members. Trust us, we will not let this slip through the cracks, we will be checking in regularly with council to make sure this is changed and finalized.

I’ve included the link for the workshop and the portion regarding backyard chickens starts at about 33 minutes in to the meeting: City of Glendale Council Workshop 1/19/2016

I’ve also included the link to the item number that includes the slide show that staff presented to council for anyone else wishing to try to change their city ordinance regarding backyard chickens: City of Glendale Council Workshop Minutes & Slide Show

This article was published on Thursday, January 21 regarding the council meeting on January 19th: Glendale Star Article

Another article published on Thursday, January 28 regarding backyard chickens in the Glendale Star, yes we are the homeowners that Mr. Turner is referring to in this article.

This doesn’t change existing HOA rules or bylaws that do not allow backyard chickens. Anyone who resides in an HOA will need to petition their HOA to allow backyard chickens. It has been done several times over the last few months with success.

Our next step is building a house and run for our next flock of hens and deciding what types of chickens to get, we have some ideas, but will do a bit more research.

We hope that you will follow us in our next adventure! We can't wait!

M & S
Uptown Grange

Monday, January 11, 2016

Swiss Chard & Kale Kimchi {Fermented}

Our swiss chard and kale are still thriving, we were trying to figure out a way to preserve them so that we can start getting the garden bed ready for other veggies. As I was researching “preserving swiss chard & kale" I ran across several Kimchi {Kimchee} recipes. I then noticed the health benefits and it seemed like everywhere I turned Kimchi was being recommended for leaky gut, IBS and a general immune system boost. I thought to myself, well, why not, rather than using napa cabbage we can use swiss chard and kale, I found several recipes and sort of combined them.

We gathered a basket full of mixed swiss chard & kale and 2 random radishes that were in with the kale all fresh veggies from our garden.


We then rinsed all the veggies in the sink and let them dry on the counter on top of a clean dish cloth. Once dried we started chopping, cutting, slicing, grating etc. all of our veggies that we were going to add to our Kimchi.


Once everything was chopped, cut, sliced and grated {into 2 bowls} we sprinkled with salt and started working everything together with our hands. The salt, even the little bit that we used in both bowls, really melts down the swiss chard and kale. We started with 2 large glass bowls and ended up being able to combine the bowls and it barely came halfway up the bowl.


Grangeman wanted a spicy spicy one so he added simbal to his Kimchi, I only used whatever red pepper flakes we added prior to mixing the veggies.

Swiss Chard & Kale Kimchi Recipe

1 lb. swiss chard
1/2 lb. kale
3 carrots
1/2  daikon radish
2 red radishes {not required}
1 T ginger
1 T turmeric
1 T garlic
1 bunch green onions
2 T pink himalayan salt or sea salt {do not use regular table salt}
1 T red pepper flakes {more or less to your taste}
1 – 2 T cayenne pepper {more or less to your taste, we did not add this this time around}

You can use pretty much any veggie, other options are zucchini, cucumbers, cabbage, and napa cabbage {which is the traditional}

Instructions

  1. Mix all of the above together until wilted down. 
  2. Place mixture into your container of choice {we used regular canning jars for our mixture} and leave at least 1 inch head space at the top
  3. Push mixture all the way down until covered in its own juices {brine}
  4. Put lids on loosely so gas can escape {otherwise your jars may explode} 
  5. Place jars in a cool area in your house 
  6. We placed them on a plate in case they overflowed from their short fermenting process. 
  7. Shake jars each time you walk by them {don’t forget to tighten lid for shaking then loosen when done}
  8. After day 1 you can taste your Kimchi, if it is not to your liking you can leave it out for another day or two, place in refrigerator after no more than 5-7 days.
  9. Enjoy for up to 3 months
  10. Incorporate about 1-2 t a day depending upon your preference, go slowly and increase the amount as you feel you can handle the reason for this is each person is different and your body may not agree with it right off the bat {gas, bloating}
We used colored ball jars except the small one that is is the front.

Health Benefits of Kimchi & Other Fermented Foods

Fermented foods are a natural probiotic, there are claims that Kimchi and other fermented foods can prevent cancers, help/cure leaky gut, prevent heart disease, help lose weight, boost your immune system {70%-80% of your immune system is in your gut}, help to lower cholesterol, help your skin & hair, and even help slow down the aging process.

So make your gut & body happy and eat fermented foods. {Consult your Dr. if you have high blood pressure or other health concerns before you start enjoying Kimchi}

...the feast of the harvest, the fruits of thy labors... Exodus 23:16

M & S
Uptown Grange

Friday, January 1, 2016

HaPpY NeW YeAr! 2 0 1 6

As the New Year is upon us all with hopes anew, here is to wishing you and your family good health, promises of a brighter tomorrow and wonderful year ahead. 

We are hopeful that we are able to raise backyard chickens again, bountiful vegetable gardens, good health for us & our loved ones and peace.

While we don't have our girls any longer, this is still one of my favorite photos!
Happy New Year from Uptown Grange!

M & S
Uptown Grange

Monday, December 28, 2015

Making Your Own Laundry Soap

Several years ago {like 8} I became more aware of what foods, chemicals, environment and other unavoidable toxins can do to your body. Since then I’ve tried to become more aware of the foods I eat and to avoid toxins whenever I can feasibly do it. {Like I never microwave something in a plastic dish}

One of the items I decided to change in our family was our laundry detergent. I bought a name brand and it seemed to work just fine, but then I started reading ingredients that I couldn’t even say and started hearing more about what these ingredients can and are doing to our bodies. 

I decided that I wanted to start making our laundry detergent. Now, it is more dense than the laundry detergent you buy at the store, but it was worth it to me in the long run. No, our clothes don’t have that nice smell anymore, but I know they are clean. 

I use Borax, Baking Soda and Zote’ or Fels Naptha. On occasion I will add Biz.


RECIPE (you can use your own judgement too)

4 Cups Borax
2 Cups Baking Soda
1 Cup Biz
1/2 Bar Zote’ or Fels Naptha (grated as finely as you can get it)


Mix together with a whisk or wooden spoon in a large bowl. Once completely mixed together put inside of a jar or container that you have chosen to store you homemade laundry detergent in.  I rescued a small scoop from another detergent and that is what I use to put the soap in my washing machine.  We have an HE washer and dryer so we don't use as much detergent as we used to.  Plus you don't need as much to wash your clothes with this homemade laundry detergent.


Knowing that it is healthier for my family makes the difference for me.  

M & S
Uptown Grange

Friday, December 11, 2015

First Fall Garden {Former Chicken Yard}

 Back in September we planted beets, swiss chards, carrots, radishes, kale and green beans in the former chicken yard. We were afraid that since this yard was recently vacated by our 8 girls that there might be too much nitrogen in the dirt. 

Well, the radishes, swiss chard and kale and doing wonderful, in fact they exceeded any expectations exceeded any previous time we’ve planted them. Baker Creek seeds really do provide very good seeds, and we couldn’t be more pleased with the results of these three crops. 


Kale surrounded by tomato plants
From Left to Right: radishes, carrots, swiss chard and beets
The beets and carrots however, did not fare as well. They did get big beautiful tops, but did not provide much in the form of beets or carrots to eat. We were afraid that this was going to happen with these 2 crops, but it was definitely worth the shot. We did learn a lesson and you can’t learn without trial and error. 

When we pull the garden, we will share what we ended up doing with everything. I believe that they will all be blanched for the most part, but I’ve also heard a lot about kale chips and I wanted to try to make some of those.  {the carrot tops already made it into the composted}

The green beans really did climb well, but they haven't produced any beans to date.

Oh yes, lets not forget about our volunteer tomatoes in the former chicken yard. We have several that have blossoms on them. Once all the other crops are pulled we will put them in tomato cages and cover them so they can be in a sort of greenhouse. Hopefully we won’t need to plant any tomatoes this coming spring, just depends upon if they end up being indeterminate tomatoes or determinate.

Bottom left is our Kale and behind the tomato was our little radish patch.
M & S
Uptown Grange

Thursday, December 10, 2015

The Hunt….Quick Update!

Unfortunately there were just as many people there when they returned later that week as there were when they left on Saturday.

So lesson learned, put in for an earlier hunt in a less popular area.  Have your own camper, travel trailer or pop up so you are not at dependent upon the individual who owns the travel trailer and their timeline.

Oh, yeah, and listen to your wife when she says to head up a day earlier than necessary, you’ll get a better camping spot, and can scout out before everyone else shows up and spoils the hunt for everyone.

M & S                                  

Uptown Grange

Friday, December 4, 2015

Tidying Up…I’m Overwhelmed!

I had such grand plans and such motivation. There is the room of doom, Dudes bedroom {it’s very messy}, the linen closet, the laundry room, the pantry and the other pantry that all need to be more than tidied up. They need MAJOR de-collectioning!

When I think about tidying up, I am excited, I have the motivation, I even get a bit of a rush, "YES, I AM GOING TO DO THIS!", but when it comes to doing it, that’s another story. I’ll get to the point where I walk into the room or open the door and my motivation just deflates….COMPLETELY!

Sometimes I have the determination to get the cleaning done, but normally that is because I am at my wits end or I am expecting company. Since these areas are not seen by company I am not as determined.

Like right now, I feel the determination to get these areas cleaned and de-collectioned, but the thought of actually doing it makes me feel overwhelmed.

I’ll read a book and feel the determination and then the same happens….deflation.

I guess I will have to put on my big girl panties and just dive in and get it done! Make an agenda of what I want accomplished and give myself a deadline of when I want it completed for each task.

I wonder if I give myself a small treat for each accomplishment completed by my deadline if that would work.  When everything on my original agenda is de-collectioned I could treat myself to a pedicure or manicure, something I don't usually treat myself to.

Is this the weekend that I finally conquer my anxiety with my collections?  I've saved some boxes up from work so I have something to put stuff that I no longer need, items to donate and trash in!

I’m going to give the agenda and treat idea a shot, I’ll let you know what happens.

M & S
Uptown Grange

Wednesday, December 2, 2015

Baby It's Cold Outside...It's too CoLd For Us...

I know two posts in one day, I am making up for missing a few weeks and I found some motivation last night!

They say the threat of freezing temperatures is over, for now anyway, and we are glad.  We are not equipped for this cold weather in Arizona especially in November; we had to dig out our winter coats long before we put up our Christmas tree.  The weather we are seeing now is our normal January/February weather.   

We're ready for regular fall weather, well actually that’s a lie, we’re ready for spring weather and spring gardening.  However, our basil is going crazy and so are our roses. We decided 4 days too late that it was time to cover the plants at night, so hopefully we don’t lose any due to frost/freezing.  It is only supposed to get down to 41 degrees tonight but given our location sometimes it dips a bit below that, so we will cover again tonight.  We will also water the plants as well as that has helped in the past to keep them from freezing, again 4 days too late.

As I’ve said before, we are not a cold weather family.  We like the heat and warmth of spring and summer.  And of course, we love the spring veggie gardens!  AND hopefully this year we will be able to have some spring chickens! xoxox

Come on SpRiNg!

M & S

Uptown Grange

The Hunt Is On…Literally!

Grange man and Dude were drawn for late season bull elk in 5b up near Lake Mary, AZ. The season is from the Friday after Thanksgiving to the following Thursday, so only 7 days. From what I’ve been able to see Arizona Game and Fish issued 590 tags to this same area for this time frame. While 6A just across Lake Mary road they issued 825 tags for the same time frame.

They went up on Thanksgiving Day after we ate our dinner, made camp about 4:00 p.m. and started scouting. Grange man said there were people camping at every corner. The decision was made to come home on Saturday evening after they had tried all day, and that they would head back up on Tuesday or Wednesday after most of the campers left {hopefully}. They saw a total of two bull elks and only 7 hanging while they were up there.

Wednesday was the day, the are leaving around 3:30 in the morning so that there is at least 2 full days left for hunting.

Send good hunting juju or vibes, we could use them.

M & S

Uptown Grange

Tuesday, December 1, 2015

Item of Special Interest {Backyard Chickens} Council Workshop – Postponed to January 19, 2016 Glendale, AZ

I spoke with Ryan Lee {assistant to Bart Turner} today. He advised that the workshop scheduled for December 15th to discuss backyard chicken keeping has been postponed until Tuesday, January 19, 2016. See below e-mail from Ryan:

Hi Shelly,

Staff is currently researching and preparing a report to the City Council regarding allowing chickens as pets in residential neighborhoods. We were informed last week that the report will be shared with the Council on January 19, not December 15. We apologize for the delay and look forward to seeing you at the Council Workshop on January 19.

Best regards,

Ryan Lee
Council Assistant, Barrel & Cholla District
Glendale City Council
623-930-2250


If you haven’t had a chance to contact your council member you still have over a month to do so, this also means that we have the extra time frame to reach out to more city of Glendale residents.

Please spread the word about the meeting change, I know there were a few individuals including us that were planning on the meeting this month.

We have also started a petition on change.org to allow backyard chickens.  If you reside in Glendale or are thinking about moving to Glendale please sign it.  If you've decided not to buy in Glendale because of the backyard chicken restrictions you can sign it also, please click on the below link.

Make Backyard Chickens legal for all city of Glendale, AZ residents

Not sure who your council member is? Please see below map.

Glendale District Map 2015

Thursday, November 12, 2015

City of Glendale - Contact Your Councilmember!

We received a call from the assistant to Bart Turner {Barrel District}.  They are requesting that any / all city of Glendale residents that want to legalize Backyard Chickens to contact their council member before the December 15th Workshop.  I would suggest e-mailing that way you have a record, I would also like to suggest including Bart Turner in the e-mail as this is his item of special interest.

ANY RESIDENT IN GLENDALE....This is for any city of Glendale resident please contact your council member even if you are currently allowed to have chickens on your property.  Show support for those that currently are not allowed this option.  

They requested that you send your name, district and address.  HOWEVER, I would only include your name and district if you already have chickens illegally, we don't want anyone else to get into trouble.

If you need help in writing your e-mail feel free to contact me at uptowngrange@gmail.com.  You can also reach us on facebook at Uptown Grange.  There is always the option to research some suggestions online as well.  It doesn't need to be anything fancy or technical, just a simple letter showing support of allowing backyard chickens in the city of Glendale on regular residential lots.  If you want to add more, please go ahead, the more information the better.  I wouldn't limit the number of chickens that you are requesting to have on your lots.  We aren't saying a minimum would be good, however, if they allow to few it may put some families that already have chickens in an awkward position. 

Remember Sahuaro District resident's just recently had a council member change.  See the updated map below for your council member.  Also included below is a direct link to your council members e-mail address and their phone numbers.

Councilmember Bart Turner {Barrel District)}
City Council Office: 623-930-2249
Email: bturner@glendaleaz.com

Vice Mayor Ian Hugh {Cactus District}
City Council Office: 623-930-2249
Cell: 602-615-7672
E-mail: ihugh@glendaleaz.com

Councilmember Lauren Tolmachoff {Cholla District}
City Council Office: 623-930-2249
Email: ltolmachoff@glendaleaz.com

Councilmember Jamie Aldama {Ocotillo District}
City Council Office: 623-930-2249
Email: jaldama@glendaleaz.com

Councilmember Ray Malnar {Sahuaro District}
City Council Office: 623-930- 2245
Email: rmalnar@glendaleaz.com

Councilmember Samuel Chavira {Yucca District}
City Council Office: 623-930-2249
Email: schavira@glendaleaz.com


Glendale District Map 2015

Saturday, November 7, 2015

Building a Compost Container

FINALLY!  The Grange man got some pallets and create a compost container.  

We weren't sure exactly where to place it.  We wanted it to be somewhere where the dogs wouldn't be able to get into it and enjoy it {remember the manure & turds}.  We also wanted it some place that would be easy access should we be able to get chickens again so we can put their manure in there as well.

The spot is the side yard where to girls were, towards the front of the house, that way it is far enough away from ANYONE'S patio.  

Grange man found 3 full pallets and a 1/2 pallet.  This worked perfectly.

The finished product, Grange man used about 2 dozen drywall screws

A view of it from the garden gate and you can also see our fall garden bed

We had been "collecting" some of our discarded veggies, egg shells and coffee grounds so we already had some "goodies" to put inside of it....{it smelled like a good organic earthy matter}.


Hopefully it will be functional for us, and a good spot, and hopefully the girls {when we can hopefully have chickens again} won't bother it too much, but we can always block it off from them.

M & S
Uptown Grange

Wednesday, November 4, 2015

Red Onions ~ What to do with them?

A few weeks ago my mom brought over about a dozen small sized red onions. Grange man and Dude LoVe onions, like they will go out of their way and just eat onions, they really are sick men. Anyway, there were just too many for us to use up before they went bad, so we decided why don’t we pickle them?

Onions make me emotional. I just took off the paper skins and cut off the top and bottom and was literally crying the entire time. Grange man and Doodles just laughed at me, and kept asking me “what’s wrong”….jerks.

Grange man sliced them otherwise I would have been an even bigger blubbering mess.

Pickled Red Onions


1. Slice onions real thin

2. Place in a water solution with a bit of salt and let soak in the refrigerator for 4-6 hours or overnight {the longer they soak the less crispy they will be}

3. Boil or sterilize jars and lids while onions are soaking


4. After finished soaking dump onions into strainer to remove liquid

5. Make a refrigerator pickle recipe {recipe to follow}

6. Put sliced onions in jars to within ½ inch from the top of the jar {we chose pint size jars}


7. Using your canning funnel pour hot pickle recipe over onions in jar to within ½ from the top of the jar or covering all onions.

8. Place jars in an area to cool

9. After jars are cooled down place in refrigerator, these will keep for at least 6 months

They’ll be good on brats, hotdogs or even hamburgers, or you could even eat them alone.


Refrigerator Dill Pickles {Makes them taste like Klaussen’s}

Pickling Solution:
6 C Water
2 C White Vinegar
1/2 C Canning Salt
1/2 tsp Alum {optional, does help to keep crisp}
1 T Pickling Spice

Bring above ingredients to a boil.
Refrigerate, and they will be ready in 2 - 4 days

This is the recipe we use each summer for our pickling cucumbers, it calls for 4 - 5 lbs of freshly picked cucumbers.  Will post that recipe next summer when we make pickles again, there are additional things to add.

M & S
Uptown Grange

Monday, November 2, 2015

Pumpkin Puree


GrEaT pumpkin adventures on the Grange.


One of our local stores and the one that Grange man just happens to love had pumpkins on sale for $0.01 {yes, one penny} each, not per pound, just each. Holy cow, can you imagine…well, we did, I sent Grange man and Doodles up there to get a few and they were already back to regular price, figure’s that our luck. They did come back with 2 pumpkins though, in addition to the pumpkin that Doodles already picked up a few days before Halloween, so we had a total of 3 pumpkins.

The plan I had for these pumpkins was to simply them to puree them. Some recommend that you buy the smaller pumpkins but I figured, WHY!?! if you get the bigger pumpkins it means more puree.  {I'm wishing we would have got the smaller pumpkins...I honestly don't know what I am going to do with all this puree}  The pumpkins were about the size of a volleyball and basketball. Not unreasonably sized, GrEaT for carving, but that isn’t what we were going to do with them.

I had this image in my mind of the awesome smell of pumpkin wafting through the house as they baked. To me pumpkin is a smell that defines fall….but without the nutmeg and other spices it really doesn’t have a smell or even much of a taste....so that was a bummer.

Grange man helped me out, he cut off the tops and we gutted them the best we could. {We saved the seeds to bake later…recipe to follow}. Then he cut them in half and then half again and then in half again. We had 4 baking sheets of cut up pumpkin. Yes, it was a tad bit overwhelming.

Roasted Pumpkin Puree Steps

1. Preheat oven to 350 degrees

2. Whole Pumpkins {however many you are ambitious enough to bake and the size you prefer}

3. Cut out top of pumpkin {like you normally do}

4. You can either cut in half and gut pumpkin or you can do it the old fashion way by gutting from the top

5. Cut up into manageable chunks {4” to 5” square or triangular} you can put these upside down or right side up on your baking sheets

6. Bake from 45 – 60 minutes or until fork soft

7. Let cool


8. Remove pumpkin skin and slice into 1 – 1 ½ inch chunks


9. Put into food processor with the grater attachment and the chop attachment to get a fine puree

Depending upon how much you are processing, you can either remove the puree directly out of the mixer or pour into a bowl. We made a bunch so we poured ours into a bowl and repeated step 9 until all of the pumpkin was pureed.

This is our first 2 pans...as you can see we've only filled 2 bags and we have much more to go...oy vey!
10. Put about 1-2 cups into a freezer zip lock sandwich bag {Grange man decided to make some of them extra full}

11. Lay flat and freeze

I’ll share recipes when I get a chance to start making stuff with the pumpkin puree. I love pumpkin and so does Doodles, the dogs even love pumpkin so they will get some dog treats made for them too. They got to get in on the act too and had a few chunks every now and then.

Grange man just kept saying “I sure hope you like pumpkin”…."because that is a lot of pumpkin"

M & S
Uptown Grange

Saturday, October 31, 2015

Canning ~ Sauerkraut

On September 26, 2015 the Hubs started his second attempt at making home made sauerkraut.  There are some changes that we need to make to the recipe as far as how much salt to add.  The nice thing about cabbage is, it is cheap to do our experiments until we have it fined tuned.

The Hubs chopped up the cabbage real fine and added salt and mashed the two together until the sauerkraut was getting watery.


To hold down the cabbage so it would say immersed in its own liquid, the Hubs used a plate with a rock on top {the rock was inside of a zip lock bag}.


This is after 38 days this is the end result.  The Hubs used 2 heads of cabbage and a bit too much salt, but we will know for next time.


1 Quart, 2 Pints and one 1/2 Pint

This is the recipe we will use next time.  It is from a vintage Kerr canning book, {that my folks left behind for us}.

Use good, sound heads of mature cabbage.  1 pound of salt with 40 pounds of cabbage; or more realistically, 2 ounces ( 3 1/2 tablespoons) with 5 pounds cabbage.  One pound fills 1 pint glass jar.

Remove outside green and dirty leaves.  Quarter the head and shred the cabbage finely. Put 5 pounds cabbage and 2 ounces of salt into a large pan and mix with hands; we would use the wooden masher we have.   Pack gently into the crock {or whatever container you are using, we used a food grade plastic bucket} with a potato masher.  Repeat until crock is nearly full.  Cover with a cloth, plate and weight.  During the curing process, kraut requires daily attention.  Remove scum as it forms and wash and scald the cloth often to keep it free from scum and mold.  Fermentation will be complete in 10 to 12 days.

As soon as the kraut is thoroughly cured, pack into clean KERR Jars, adding enough of the kraut juice, or a weak brine made by dissolving 2 tablespoons salt into a quart of water, to fill jars to within 1/2 inch of the top of the jar.  Put on cap, screwing the band tight.  Process in a water bath for 15 minutes.

We lefts ours for 38 days, and then canned it today.  Hoping it turns out okay, we would like to use the sauerkraut we made today on Ruben sandwiches.

...the feast of the harvest, the fruits of thy labors... Exodus 23:16

M & S
Uptown Grange

Friday, October 30, 2015

Bumper Crop ~ Fall 2015!

OMGoodness! So far this fall garden is appearing to be a bumper crop! 

We thought for sure we were going to lose some of our long beans from the hail storm a few weeks ago, but they seem to be thriving. They are to a point where they are starting to climb up the trellis that Hubs made for them.

The radishes are going crazy, we’ve enjoyed a few from the garden already and they are huge we've grown radishes in the past but they have never been this large and they are very tasty.  We will be planting some more here within the next few weeks.  These can be grown most of the winter here in Arizona.


Of course we have to thank our girls as they helped us with their awesome fertilizer for being on the side yard for over 2 years!

The kale, swiss chard, beets and bush beans are coming up nicely, hoping for a crop of each by Thanksgiving.

Brussel sprouts, cauliflower, cabbage and spinach are showing signs of coming up, they were planted two weeks ago.

We are so impressed with the seeds that we purchased online. If you think about it, the seeds cost less than they would if you were buying organic seeds in a big box hardware store or other big box store. The average price is $2.25 to $3.00 per package, they are organic GMO free seeds. EVERY seed that we plant has come up without fail, this is a bonus as normally if you buy seeds from one of the above type stores you are guessing if they will come up and how big your crop will be. You do have to pay for shipping but that cost is minimal {$5.00 at most}, also they are such an awesome company, each time we’ve bought seeds from them, they have thrown in a random seed packet for free! We will definitely be purchasing our seeds from them again and again. 

M & S 
Uptown Grange

Tuesday, October 27, 2015

Tidying Up ~ Day 1


I read a few short books {like under 50 pages} over the weekend on de-cluttering {de-collectioning}. One of the books did not make any sense to me at all, it talked more about organizing rather than de-collectioning, and how to hide stuff. The second book pertained much more to de-collectioning and organizing, still not exactly what I was looking for, but a much better help.

I started off in the hall bathroom cabinet. This is the bathroom that the hubs, my 16 year old and any guests typically use {I hope our guests never looked under the cabinet…YIKES, it was very scary}. There were cleaning products, dog shampoo, raw vinegar, Epsom salt, pedicure stuff and a ton of random bottles of empty shampoo, just sort of thrown in there. I already had a plastic shelf unit in there so it was relatively easy to get organized. I turned the shelf around and was able to make it look more orderly. I threw out what was empty, old or no longer needed. I also went through the draws and was able to completely empty one of the drawers and organize the drawer with stuff in it. To organize the drawers I used clear cosmetic bags that I had saved and had an individual bag for: random dental stuff and then another bag for shaving stuff. This really cleaned the drawer out nicely, just hoping that it stays this way.

Hallway/Guest Bathroom
Next it was on to the master bath. It’s not really as grand as a master bath, it has a shower, a toilet and a sink, and it is about 5’ x 6’. The cabinet in there is really extra small and there is also a shelf/stand type thing that we put behind the toilet for more storage. Under the sink again I already had shelves to try to keep the organization in shape, again that failed. I had so many bottles of old lotions, body soaps and make-up. I really purged a lot in this cabinet. I was able to take some stuff that was on the shelf/stand behind the toilet and move it into this cabinet under the sink. The sink in the master bath is also very tiny and easily cluttered so I tried to remove as much as I could from it “appear cleaner”. This really helped by removing stuff from the shelf and counter top. We still have some work to do in this bathroom, but at least a good portion of the eyesore has been “hidden”.

I next moved onto my dresser. I was determined to purge as many clothes as possible and re-design the way I lay out the clothes in them. We have antique dressers so they aren’t the easiest to open and close as it is and I was hoping that re-designing them would help with this. I was only able to purge a few pairs of pajama bottoms and a few shirts, but it still felt great. I folded the clothes and stacked them and then turned the stack sideways so that I could visually see all of my bottoms and tops. It looks so much better and it definitely easier finding and getting clothes this way too, I no longer have to dig through stacks to find the shirt or bottoms I am looking for, I just find the color and bottoms I want and grab. I did this to 4 of my drawers in our room and was able to completely eliminate usage of one drawer {the hubs now has an extra drawer}. I still have to work on the “lingerie” drawer, but I have to decide how I want to lay that one out.

Just one of my drawers, too many to post the all.
I was feeling very accomplished and motivated by the time I was finished with each bathroom and my dresser that I moved onto my portion of the master closet. Again this is maybe 4’ x 6’, the hubs “remolded” it and at least we now have two rows of clothes rods rather than just the one and a shelf like when we first moved in. Of course my clothes take up ¾ of the closet. I was able to find about a foot worth of clothes that I either no longer wear or were to big/small for me. I do try to go through my closet at least once a year and do this. My BFF likes to go through the clothes I am removing and she has friends that she shares them with as well. It’s a win win!

And finally, I went through my nail polish, by this time the sun was going down and I wasn’t as ambitious as I was earlier in the day, so I figured this was a good thing to finish off with for the day. It was time to go through the nail polish; I was going through a craze where I would find these bright funky colors for cheap. Well since then, I’ve started doing my own gel nails and I am trying to match the gel polish to lacquer polish when I buy it, so I was able to taper it down and put my gel polish and matching nail polish along with my LED lamp in there so they now have a more permanent home. I removed about ¾ of a shoe box full of nail polish. My oldest son’s girlfriend said she would like to go through it and she has two sisters, so I am hoping by the time they are finished it all has a new home, she will also go through the hair products that I found that I no longer need. Again, it is a win win!

By the end of the day I felt good about getting stuff organized and de-collectioned. I know that I have A LOT {understatement} more to do, but this was a good start.

All in all it took me about 5 hours to complete. I didn’t say good bye to anything or tell it thank you, I’m more of the personality where I just cut ties…but I feel a bit more at ease and know that I really need to go through my whole house. I also need to get the hubs and the teenager involved in this as well.

M & S
Uptown Grange

Friday, October 23, 2015

Tidying Up!

OH BOY!  We have a lot of clutter, and I mean a lot.  We like to collect things, so I am going to change that from clutter to collections.  Our collections range from Ball & Kerr jars, clocks, meat grinders, enamelware and a lot of other primitive items I’ve collected along the way. 

We also have what I like to call the “ROOM OF DOOM{my nemesis}.   Before we bought the house it was my mom’s sewing room.  My parents converted the former living room into a “room” so my mom had a front door for her business and people weren’t walking through our house, she was a professional monogrammer.  Anyway, the hubs took out the window and put a closet in its place.  The intention of the room was a craft/sewing room/small storage room for our family. 

It has just taken on a life of its own.  If we’ve had a project in the house and had to box things up, yep, you guessed it, it goes in that room.  If there are items that we have intentions of getting rid of, yep, you guessed it, they get put in that room.  If we don’t have a use for it right then and there, yep, you guessed it, it goes in that room. 

You see, I have a problem, I’ve inherited from my mom, she got it from here mom and now our youngest son has it also, we like to hoard….there I’ve said it….we aren’t the type where the wall will come tumbling down if you move one thing from the pile, but I have a problem letting go of things.
 
I still have some of our boys’ clothes, shoes and toys {they are 19 & 16}, the reason I tell myself is “someday we will have grandchildren and they can use those items”.  It will be cheaper to have the toys already bought and paid for...right...eye roll….by the time we have grand-kids the toys will be brittle, the clothes will have holes or no elastic and the shoes will have no grip left on the soles.  I know these things need to go, most of them, but I can’t part with them.  I really need help.  I plan on reading a couple of de-collectioning {like how I just made up that phrase} books over the weekend to find some inspiration. 

If you have a story or advice, please feel free to leave a message, I am open to suggestions.  I’ll let you know what I feel or think or if anything in the way of de-collectioning was done over the weekend.

M & S
Uptown Grange

Wednesday, October 21, 2015

Garden Lasagna – So Far So Good

It’s been about 2 weeks since we made our garden lasagna in two of our garden beds.

It’s working pretty good only a few spots have Bermuda coming through, we sort of expected this. I’ve poured hot boiling water on them to see if that will stop them in their tracks, this works on the purslane.

If the boiling water doesn’t work I will definitely try using a home made weed killer. The Bermuda is mostly sneaking through the edges. These are spots where we may have missed the garden lasagna or it settled differently than we anticipated and we don’t plant near the edges anyway.

The other slight issue is the straw is growing so we have to stay on top of pulling it out.

Would we do it again? I’m not sure we will have to see what happens over all on how the garden beds look after it finally turns into a garden bed that can be planted in again.

We’ll keep you updated.

M & S
Uptown Grange